线程创建的五种方式与Thread类方法的使用
迪丽瓦拉
2025-05-28 19:55:34
0次
文章目录
- Thread 类
- 写在前面
- 1.线程创建
- 2.线程中断
- 2.1 自定义标记符中断
- 2.2 调用 interrupt() 方法来通知
- 3.线程等待
- 4.线程休眠
Thread 类
写在前面
为了更好的操作线程,Java为我们定义了一个类用来管理线程。Thread类即是,且每一个线程都有唯一的Thread对象与之关联。JVM会将这些Thread 对象组织起来,用于线程调度,线程管理。
以下为Thread的常见构造方法:
- Thread(),无参创建线程对象。
- Thread(Runnable tarrget),使用实现Runnable接口对象创建线程对象。
- Thread(String name),创建线程对象并命名。
- Thread(Runnable tarrget,String name),使用实现Runnable接口对象创建线程对象,并命名。
1.线程创建
根据Thread类的构造方法,我们有五种线程创建的方式:
- 定义子类继承Thread类创建线程:
代码如下:
package threading;/*** @author zq* 继承Thread,重写run创建线程*/
class  MyThread extends Thread{@Overridepublic void run() {while (true) {System.out.println("Hello,t");try {Thread.sleep(1000);} catch (InterruptedException e) {e.printStackTrace();}}}
}
public class ThreadDemo1 {public static void main(String[] args) {//创建线程Thread thread = new MyThread();//启动线程thread.start();//调用操作系统的api创建线程//查看两个线程运行起来的效果while (true){System.out.println("hello,main");try {Thread.sleep(1000);} catch (InterruptedException e) {e.printStackTrace();}}//可以发现两个线程交叉执行。}
}- 定义类实现Runnable接口创建线程
代码如下:
package threading;/*** @author zq* 接口创建线程*/
class MyRunnable implements Runnable{@Overridepublic void run() {while (true){System.out.println("hello,t");try {Thread.sleep(1000);} catch (InterruptedException e) {e.printStackTrace();}}}
}public class ThreaddDemo {public static void main(String[] args) {MyRunnable runnable = new MyRunnable();Thread t = new Thread(runnable);t.start();while (true){System.out.println("hello,main");try {Thread.sleep(1000);} catch (InterruptedException e) {e.printStackTrace();}}}
}- 使用匿名内部类继承Thread创建线程
代码如下:
package threading;/*** @author zq* 使用匿名内部类*/
public class ThreadDemo3 {public static void main(String[] args) {Thread t = new Thread(){@Overridepublic void run() {System.out.println("hello,t");try {Thread.sleep(1000);} catch (InterruptedException e) {e.printStackTrace();}}};t.start();while (true){System.out.println("hello,main");try {Thread.sleep(1000);} catch (InterruptedException e) {e.printStackTrace();}}}
}- 使用匿名内部类实现Runnable创建线程
代码如下:
package threading;/*** @author zq* runnable* 使用匿名内部类*/
public class ThreadDemo4 {public static void main(String[] args) {Thread thread = new Thread(new Runnable() {@Overridepublic void run() {while (true){System.out.println("hello,t");}}});thread.start();while (true){System.out.println("hello,main");try {Thread.sleep(1000);} catch (InterruptedException e) {e.printStackTrace();}}}
}- lamda表达式创建线程(最常用)
代码如下:
package threading;/*** @author zq* lamda表达式创建线程*/
public class ThreadDemo5 {public static void main(String[] args) throws InterruptedException {Thread t = new Thread(()->{while (true){System.out.println("hello,t");try {Thread.sleep(1000);} catch (InterruptedException e) {e.printStackTrace();}}});t.start();while (true){System.out.println("hello,main");Thread.sleep(1000);}}
}
注意:
在线程创建后,我们用两种方法启动一个线程:
1.start()方法,此方法启动线程并真实的创建了一个新的线程。
2.run()方法,此方法仅仅是在当前线程中执行了被调用者的内容,并没有创建一个新的线程。
2.线程中断
线程中断目前有两种方式,我们可以自定义标识符来确定一个进程是否中断,或者使用我们Thread类中的==interrupt()方法通过修改Thread类的isInterrupted()==方法(默认值为false)的值为false来通知线程应该截止。
以下展示两种线程中断的具体实例:
2.1 自定义标记符中断
package threading;/*** @author zq* 线程终止* 自定义标志位*/
public class ThreadDemo6 {public static boolean isQuit = false;public static void main(String[] args) {Thread t = new Thread(() -> {while (! isQuit) {System.out.println("hello.t");try {Thread.sleep(1000);} catch (InterruptedException e) {e.printStackTrace();}}System.out.println("t线程终止");});t.start();//启动线程//在主线程中修改标志位控制t线程的截止try {Thread.sleep(3000);//主线程3000秒后进行} catch (InterruptedException e) {e.printStackTrace();}isQuit = true;}}
2.2 调用 interrupt() 方法来通知
package threading;/*** @author zq* Thread定义的标志位用于线程终止*/
public class ThreadDemo7 {public static void main(String[] args) {Thread t = new Thread( ()->{//currentThread是获取当前的线程实例t//isInterrupted是t对象自带的一个标志位默认为falsewhile (!Thread.currentThread().isInterrupted()){System.out.println("heleo t");try {Thread.sleep(1000);} catch (InterruptedException e) {e.printStackTrace();/*try {Thread.sleep(3000);} catch (InterruptedException ex) {ex.printStackTrace();}*///加上后3000秒之后才结束break;}}});t.start();try {Thread.sleep(3000);} catch (InterruptedException e) {e.printStackTrace();}t.interrupt();//设置此时标志位为true}
}
注意:
1.interrupt()方法的作用:
- 设置标志位为true
- 如果该线程处于阻塞状态时(如执行sleep()方法),会唤醒阻塞状态,抛出异常让sleep()立即结束
而此时sleep()被唤醒时,会清空isInterrupted标志位为false
2.interrupt()方法并不是让线程立即结束而是通知线程该结束,真正结束时间还需要看cpu调度方式。
3.线程等待
由于操作系统对线程调度随机性,有时我们无法确定一个进程何时结束,来安排我们想要实现的事情。此时我们就引入了线程等待来明确等待线程的结束,如==join()==方法。
注意:
当我们在t1线程中调用t2.join()方法时,t2线程会先结束,t1线程等待。
代码实现:
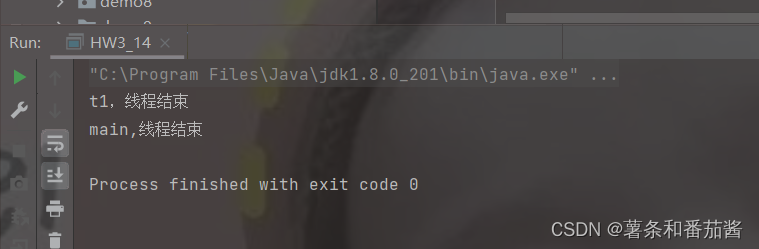
public static void main(String[] args) throws InterruptedException {Thread t1 = new Thread(()->{System.out.println("t1,线程结束");});t1.start();t1.join();System.out.println("main,线程结束");}
运行结果:
注意
- 如果在main中调用t1.join()方法时,t1已经结束,则直接执行main线程。
- 如果t1.join()方法调用时,t1还没结束,则等待t1结束后main线程再执行。
- join()加上时间参数时,指定了线程等待的最大时间,超过就不再等待。
4.线程休眠
在上述代码演示中我们已经使用到sleep()方法,顾名思义就是让线程休眠,该方法有两种用法:
- public static void sleep(long millis) throws InterruptedException, 休眠当前线程 millis毫秒
- public static void sleep(long millis, int nanos) throws
InterruptedException ,可以更高精度的休眠
注意:
由于线程调度不可控,这个方法只能保证实际休眠时间是大于参数设置的休眠时间。
相关内容
热门资讯
Linux-scheduler...
四、调度域 SDTL结构 linux内核使用SDTL结构体来组织CPU的层次关系 struct sc...
leetcode - 2379...
Description You are given a 0-indexed string block...
Retinanet网络与foc...
参考代码:https://github.com/yhenon/pytorch-reti...