pytest测试框架——pytest.ini用法

这里写目录标题
- 一、pytest用法总结
- 二、pytest.ini是什么
- 三、改变运行规则
- pytest.ini
- check_demo.py
- 执行测试用例
- 四、添加默认参数
- 五、指定执行目录
- 六、日志配置
- 七、pytest插件分类
- 八、pytest常用插件
- 九、改变测试用例的执行顺序
- 十、pytest并行与分布式执行
- 十一、pytest内置插件hook体系
- 十二、pytest插件开发
- 1、pytest_collection_modifyitems
- 2、pytest编写插件——添加命令行参数(***)
- conftest.py
- test_option.py
一、pytest用法总结
1、修改用例的命名规则
2、配置日志格式、比代码配置更方便
3、指定执行目录
4、排除搜索目录
5、添加标签,防止运行过程报警告
6、添加默认参数
二、pytest.ini是什么
pytest.ini是pytest的配置文件
可以修改pytest的默认行为
不能使用任何中文字符,包括汉字、空格、中文引号、中文冒号、中文注释
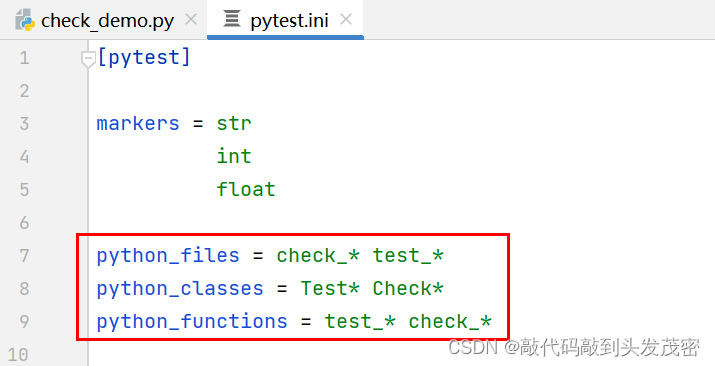
三、改变运行规则
执行check_开头和 test_开头的所有的文件,后面一定要加*
python_files = check * test *
执行所有的以Test和Check开头的类
python_classes = Test* Check*
执行所有以test_和check_开头的方法
python_functions= test_* check_*
pytest.ini
pytest.ini中不能加注释
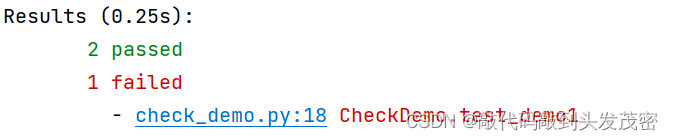
check_demo.py
import pytest
import loggingclass CheckDemo:def check_demo1(self):logging.info('这是demo1测试用例')assert 1==1def check_demo2(self):logging.info('这是demo1测试用例')assert 1==1def test_demo1(self):logging.info('这是demo1测试用例')assert 1==2
执行测试用例
pytest check_demo.py
四、添加默认参数
addopts = -v -s
五、指定执行目录
testpaths= demo1
忽略某些目录
norecursedirs = demo1 test_demo
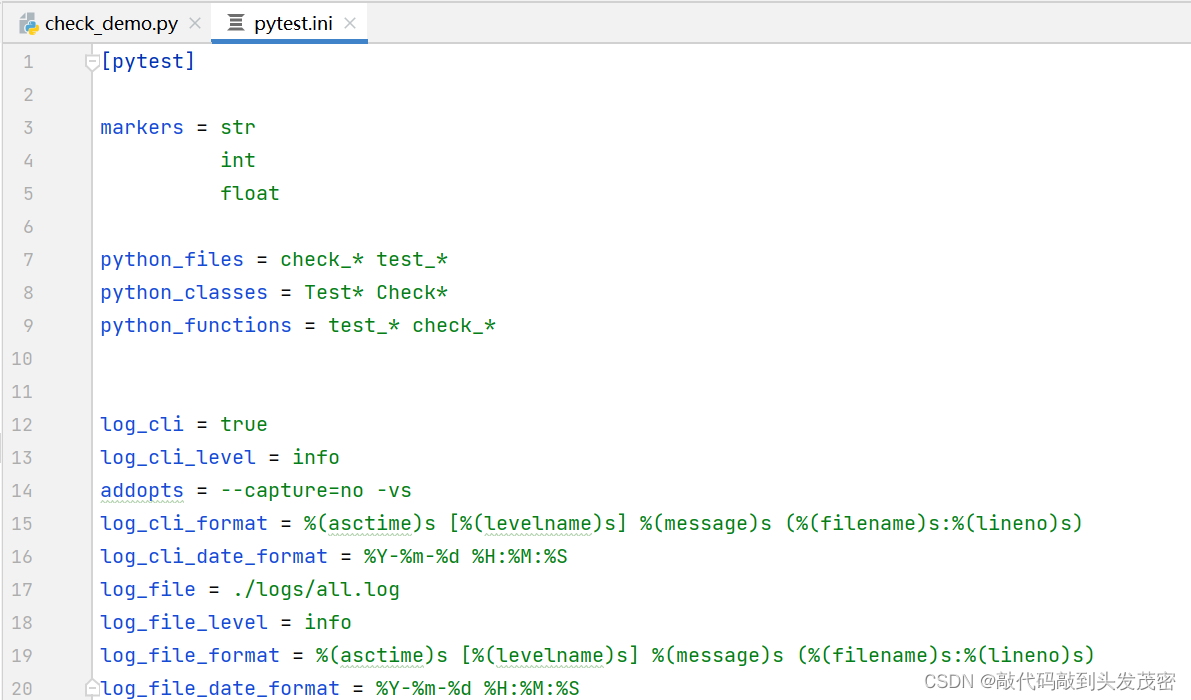
六、日志配置
七、pytest插件分类
外部插件:pip install 插件
本地插件:pytest自动发现机制(conftest/py存放)
内置插件:代码内部的_pytest目录加载
八、pytest常用插件
pip install pytest-ordering:控制用例执行顺序
pip install pytest-xdist:分布式并发执行测试用例
pip install pytest-dependency:控制用例的依赖关系
pip install pytest-rerunfailures:用例失败重跑
pip install pytest-assume:多重校验
pip install pytest-random-order:用例随机执行
pip install pytest-html:测试报告
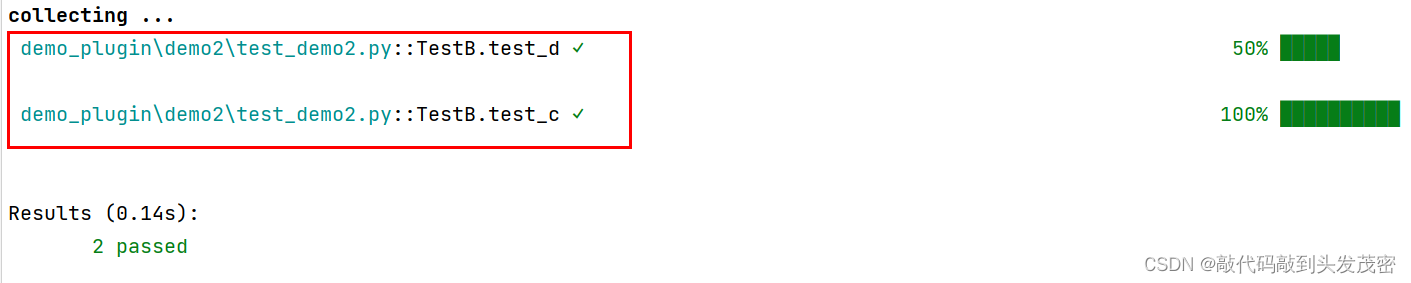
九、改变测试用例的执行顺序
安装;pip install pytest-ordering
使用:装饰器:@pytest.mark.run(order=num),安装数字从小到大的顺序执行。
pytest默认从上到下执行测试用例
import pytestclass TestB:@pytest.mark.run(order=2)def test_c(self):pass@pytest.mark.run(order=1)def test_d(self):pass
执行测试用例
十、pytest并行与分布式执行
安装:pip install xdist
注意:用例多的时候效果明显,多进程并发执行,同时支持allure
#!/usr/bin/env python
# -*- coding: utf-8 -*-
# @Time    : 2023/2/16 21:15
# @Author  : 杜兰特
# @File    : test_xdist.py
import timeimport pytestclass TestC:def test_e(self):time.sleep(1)assert Truedef test_f(self):time.sleep(1)assert Truedef test_g(self):time.sleep(1)assert Truedef test_e1(self):time.sleep(1)assert Truedef test_f2(self):time.sleep(1)assert Truedef test_g3(self):time.sleep(1)assert True
执行测试用例
-n auto:电脑默认cpu核数
D:\pytest_project>pytest -n auto
十一、pytest内置插件hook体系
1、hook函数名字固定
2、hook函数会被自动执行
3、执行是有先后顺序的
4、pytest定义了很多hook函数,可以在不同阶段实现不同的功能
5、pytest有很多钩子函数
6、使用时直接编写函数体
十二、pytest插件开发
pytest_collection_modifyitems收集上来的测试用例实现定制化功能
解决问题:
自定义用例的执行顺序
解决编码问题(中文的测试用例名称)
自动添加标签
1、pytest_collection_modifyitems
# 收集完测试用例  之后调用的hook函数
def pytest_collection_modifyitems(items):"""测试用例收集完成时,将收集到的用例名name和用例标识nodeid的中文信息显示在控制台上"""print(items)#name:用例的名字#nodeid:测试用例的路径for item in items:item.name=item.name.encode('utf-8').decode('unicode-escape')item._nodeid=item.nodeid.encode('utf-8').decode('unicode-escape')items.reverse()
2、pytest编写插件——添加命令行参数(***)
conftest.py
#定义一个命令行参数
def pytest_addoption(parser):mygroup = parser.getgroup("work") #group将下面所有的 option都展示在这个group下。mygroup.addoption("--env",               #注册一个命令行选项default = 'test',                   # 参数的默认值dest = 'env',               # 存储的变量 为属性命令,可以使用option对象访问到这个值,暂用不到help = 'set your run env'   # 帮助提示 参数的描述信息)#如何针对传入的不同参数完成不同的逻辑处理
@pytest.fixture(scope='session')
def cmdoption(request):myenv=request.config.getoption('--env',default='test')if myenv == 'test':datapath='datas/test.yaml'elif myenv == 'dev':datapath='datas/env.yaml'with open(datapath) as f:datas=yaml.safe_load(f)return myenv,datas
test_option.py
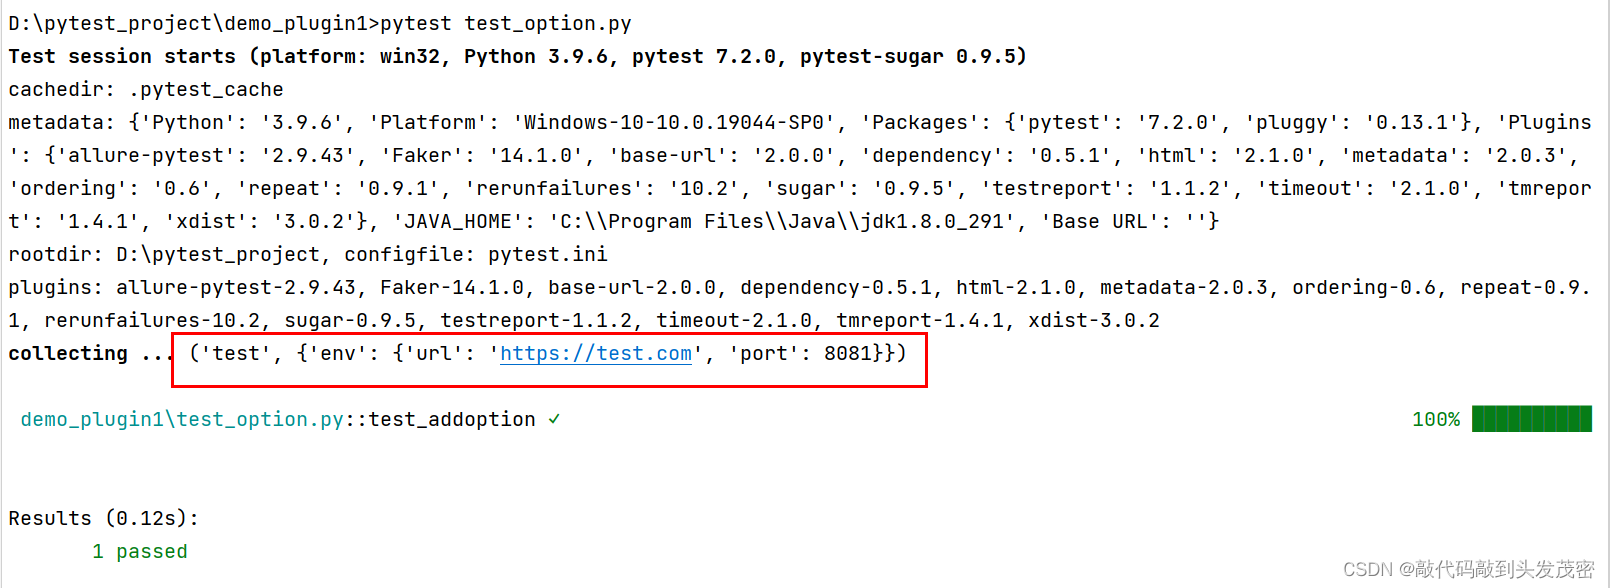
def test_addoption(cmdoption):print(cmdoption)
如果命令行不传–env参数,env环境默认为test
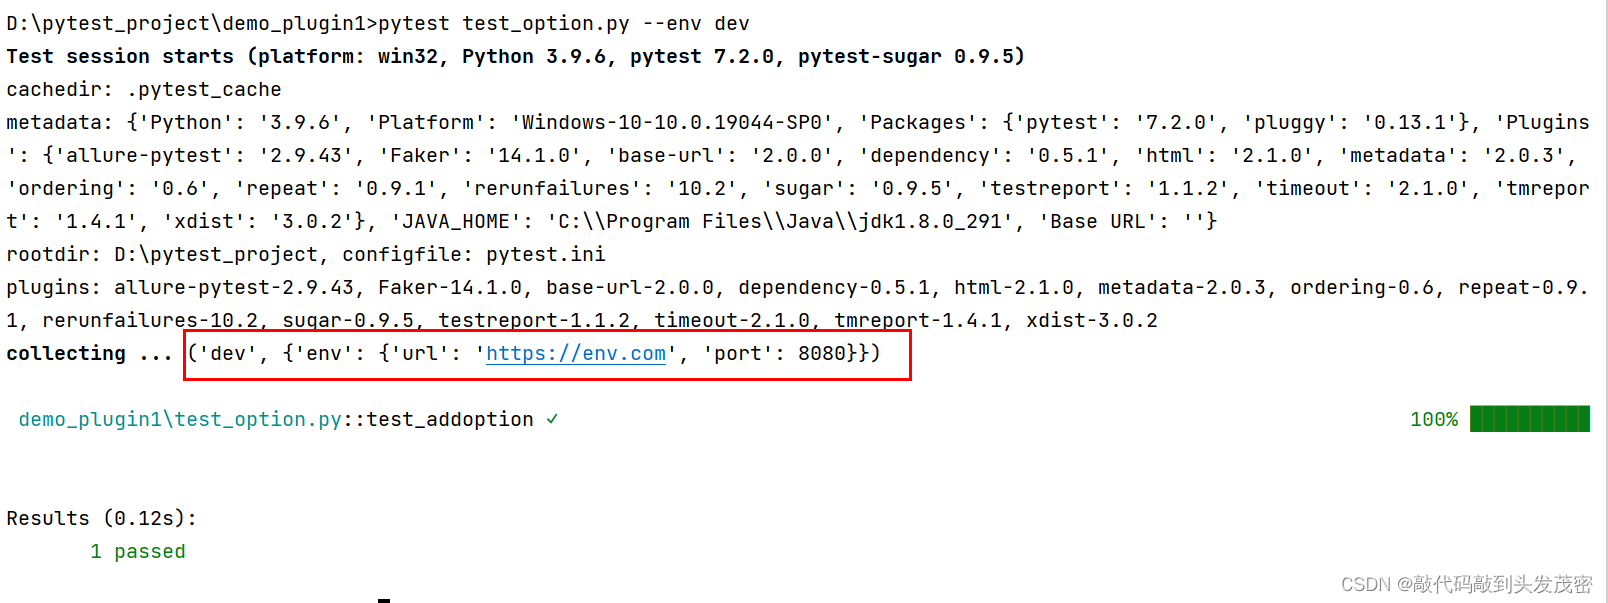
env环境需要dev的环境数据,命令行传入–env dev
D:\pytest_project\demo_plugin1>pytest test_option.py --env dev

上一篇:二、高级排序
下一篇:python多线程实现